Ever deleted any files mistakenly and wondered, wish you had a recycle bin in your android phone? Well, let’s make your wish come true.
Recycle bin is one of the most exciting features of windows PC. In case you don’t know what a recycle bin is, let me tell you. It’s a kind of dust-bin of your computer. Whenever you delete a file, say a video song, it doesn’t permanently vanish from your computer. It still remains in the dust-bin, i.e. in the recycle bin. And later if you change your mind, you can restore (undelete) it easily.
Now that’s a cool feature of computers. But what happens when you delete a file in your favorite android device? There is no recycle bin like computers in android phone or tablet. So when you delete some files, they get erased, forever. Worst thing is when you delete some of your rare, favorite file(s) accidently! That crappy – ‘What-did-I-do’ feeling is very common amongst smartphone users.
So what to do? Well, relax, chill down your jaw. We have something awesome for ya. In this article, I’m gonna tell you how to add a recycle bin in your android system which will help you to restore back accidently deleted videos, songs or any other files.
So how to do that?
Since that we don’t have that feature in our devices in-built (not even hidden), we can’t really do some magical stuffs and unlock it. Pretty obviously we’re gonna use some third party app. But, there are plenty of apps that can help you to add a bin to your phone. Just search on Playstore with the term - ‘Recycle Bin’ and more than a dozen of apps will appear. So to be sure whether the app works or not, you’ve gotta install them one by one and test. Kind of frustrating, isn’t it?
Okay, so let’s automate your job a little bit. After testing few of the apps appearing at the top of the results, I’ve sorted out the best of them.
Dumpster. One of the best file restoration apps available on android market. And the most pleasing fact is that it doesn’t really require root permission. So even un-rooted users will be able to utilize this tool.
Now let’s have a look at how to setup this app and use it to restore deleted files.
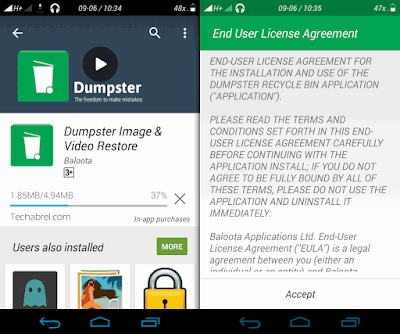
1. At first install the app from Playstore, and open it. After opening it, accept the terms and conditions, when prompted.
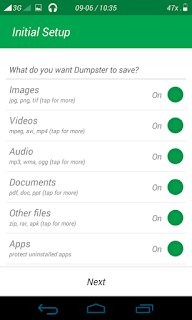
2. Next, a page willl open asking you to select your desired file types. These are the file types that the app will keep track on, and will be able to restore back when deleted. There are several other options in that page, such as auto-clean, lockscreen etc. You can enable them if you wish. And if your device is rooted you can also switch on the root access (this will help the app work better). After the selection is done, click Next.
3. Your job is done. Now sit back and wait for the accidental deletion or to see whether it works or not you can run a sample test. Simply delete any useless file (should be amongst the file types you chose previously).
4. Now open the Dumpster app. There you’ll notice a list of deleted items. Choose any item and click on it. Then simply press Restore. The file’s now successfully restored to its previous location. You can go to the folder and check whether the file is there or not.
So that’s how you can easily add a recycle bin feature in your android device using a simple third party app. Besides Dumpster, there are several other amazing apps, try them out and tell us which one works best for you. And if you face any problem restoring your files, you can comment below, we’ll reply you as soon as possible. Till then, goodbye.
About Author:
This article was written by Niladri Chatterjee, a sexy, handsome and talented author. By characteristics, he is narcissist and superlazy. Inspite of being so lazy, he founded this blog (a real inspiration for the lazy persons). You can follow him in Twitter (@TheOnlyNiladri), Facebook or Instagram (@talentedbanda).Don’t be selfish, help the society, save water, save energy and share this article


